- Published on
Gitlab CI/CD for Dockerize Flask and NextJS application
- Authors

- Name
- Martin Valentino
Several weeks ago, I wrote an article on building an application with Flask, NextJS and Docker. In that article, I described how to dockerize a flask application for the backend, next for the frontend and Nginx for a reverse-proxy server. I also show a way to run all container easily for local development using docker-compose and deploy it directly to Digital Ocean using docker-machine. The setup, I describe on that article is sufficient enough if you're still playing around on a toy project. In a real-world, with a team-based, collaborative environment, it's difficult only to allow a local machine deployment. Therefore, we need technology that allows us safely and automatically deploy the application to the cloud server.
Continuous Integration / Continuous Deployment
Here's come CI/CD technology to the rescue. As Thoughtworks explain in their article,
Continuous Integration (CI) is a development practice that requires developers to integrate code into a shared repository several times a day. Each check-in is then verified by an automated build, allowing teams to detect problems early.
Continuous Deployment is closely related to Continuous Integration and refers to the release into production of software that passes the automated tests.
In a nutshell, CI/CD allows a developer to push the code to a repository and automatically build and deploy it to our deployment environment. In this article, I'm going to show how to easily integrate our project using Gitlab CI/CD infrastructure to deploy automatically to our server in Digital Ocean.
There are several CI/CD technology or provider that you can use. For example, SASS platform such as CircleCI, TravisCI, Buildkite or set up your own infrastructure with Jenkins. In this article, I use Gitlab for my CI/CD infrastructure demonstration. The reason I choose Gitlab is that I recently worked on integrating it for my project. Also, it's one of the platforms that offer free CI/CD infrastructure with a reasonable feature.
Integrate with Gitlab CI/CD
In this tutorial, I'm going to demonstrate how to use Gitlab CI/CD infrastructure to run an automated docker image build and deploy it to Digital Ocean droplet for a dockerize Flask and NextJS application. To follow through on this tutorial, a couple of things you may need to prepare beforehand:
- Gitlab account
- DigitalOcean account.
- You can use this link to get $50 for 30 days for a new account.
All of the example in this article is available in this repo. That repo contains a simple application that consists of:
- Flask API for a backend with
UsersandAuthendpoint - NextJS application for the frontend, with a simple homepage and a login page
- Nginx for reverse-proxy for flask API and NextJS application.
A CI/CD workflow in Gitlab is configured using a file called .gitlab-ci.yml. Let's add .gitlab-ci.yml file into our root project folder. In the script, we'll create two stages there, one for building the docker image and the second one to deploy it. In this configuration, we are going to use Gitlab docker image registry to store the docker image. You can also use Docker Hub if you want to.
Initial Script
before_script:
  - export IMAGE=$CI_REGISTRY/$CI_PROJECT_NAMESPACE/$CI_PROJECT_NAME
  - apk add --no-cache openssh-client bash
  - docker login -u $CI_REGISTRY_USER -p $CI_JOB_TOKEN $CI_REGISTRY
  - chmod +x ./setup_env.sh
  - bash ./setup_env.sh
The script above runs before every stage in the workflow. The before_script part is the way in the configuration file to re-use the same steps for every stage in the workflow. The first step in the script export the environment variable for an address of where our docker image gets stored. Then, it installs open-ssh client for later login to our DigitalOcean server and bash to execute the bash script for setting up the environment variable. After that, the script login to the Gitlab docker registry so that we can push and pull the image from it.
The last step from the script above executes setup_env.sh script. The setup_env.sh script fetches all of the environment variables that are set in Gitlab CI/CD configuration and put it in the .env file. This file is going to be executed in the next steps. The content of the setup_env.sh is like:
echo CI_JOB_TOKEN=$CI_JOB_TOKEN  >> .env
echo CI_REGISTRY=$CI_REGISTRY  >> .env

echo DATABASE_URL=$DATABASE_URL >> .env
echo SECRET_KEY=$SECRET_KEY >> .env
echo REACT_APP_SERVICE_URL=$REACT_APP_SERVICE_URL >> .env

echo CLIENT_IMAGE=$IMAGE:client  >> .env
echo API_IMAGE=$IMAGE:api  >> .env
echo NGINX_IMAGE=$IMAGE:nginx >> .env
Build Stage
build:
  stage: build
  script:
    - export API_IMAGE=$IMAGE:api
    - export CLIENT_IMAGE=$IMAGE:client
    - export NGINX_IMAGE=$IMAGE:nginx
    - docker pull $IMAGE:api || true
    - docker pull $IMAGE:client || true
    - docker-compose -f docker-compose.ci.yml build
    - docker push $IMAGE:api
    - docker push $IMAGE:client
    - docker push $IMAGE:nginx
The build stage above consists of three main steps. First, it pulls the image if it exists in the registry. Next, it builds the image based on the configuration we have in the docker-compose.ci.yml file. Lastly, after the image been build, it pushes the latest build image back to the Gitlab docker image registry. The docker-compose.ci.yml file is pretty simple, only contain a configuration for the Flask and NextJS application.
version: '3.7'

services:
  api:
    build:
      context: ./api
      dockerfile: Dockerfile-prod
    image: "${API_IMAGE}"
    ports:
      - 5000
    environment:
      - FLASK_ENV=production
      - APP_SETTINGS=project.config.ProductionConfig
      - DATABASE_URL=${DATABASE_URL}
      - SECRET_KEY=${SECRET_KEY}

  nginx:
    build:
      context: ./nginx
      dockerfile: Dockerfile
    image: "${NGINX_IMAGE}"
    ports:
      - 8080:8080
    depends_on:
      - api
      - client

  client:
    build:
      context: ./client
      dockerfile: Dockerfile-prod
      args:
        - NODE_ENV=production
        - REACT_APP_SERVICE_URL=${REACT_APP_SERVICE_URL}
    image: "${CLIENT_IMAGE}"
    ports:
      - 3000
    depends_on:
      - api
Deploy Stage
For the deployment stage, the script contains several steps.
- Extract a private key that is going to be used for ssh to Digital Ocean droplet and add it to Gitlab CI/CD process
- Copy all of the required artefacts for the deployment to DO droplet by SSH-ing to it
- Run the deployment script The deployment script executes:
- SSH to the DO droplet
- Login to Gitlab docker registry from DO droplet
- Pull the docker image require (Flask and NextJS docker image)
- Run the
docker-composeto run it on the droplet
The code below shows how it's get implemented in the .gitlab-ci.yml file.
deploy:
  stage: deploy
  script:
    - export API_IMAGE=$IMAGE:api
    - export CLIENT_IMAGE=$IMAGE:client
    - export NGINX_IMAGE=$IMAGE:nginx
    - mkdir -p ~/.ssh
    - echo "$PRIVATE_KEY" | tr -d '\r' > ~/.ssh/id_rsa
    - cat ~/.ssh/id_rsa
    - chmod 700 ~/.ssh/id_rsa
    - eval "$(ssh-agent -s)"
    - ssh-add ~/.ssh/id_rsa
    - ssh-keyscan -H 'gitlab.com' >> ~/.ssh/known_hosts
    - chmod +x ./deploy.sh
    - scp  -o StrictHostKeyChecking=no -r ./.env ./docker-compose.yml.yml root@$DO_IP_ADDRESS:/app
    - bash ./deploy.sh
As you can see from the above piece of script, we need to add a new file called docker-compose.prod.yml.
version: '3.7'

services:
  api:
    image: "${API_IMAGE}"
    container_name: api
    restart: unless-stopped
    ports:
      - 5000
    environment:
      - FLASK_ENV=production
      - APP_SETTINGS=project.config.ProductionConfig
      - DATABASE_URL=${DATABASE_URL}
      - SECRET_KEY=${SECRET_KEY}

  nginx:
    image: "${NGINX_IMAGE}"
    restart: unless-stopped
    ports:
      - 80:80
    depends_on:
      - api
      - client

  client:
    image: "${CLIENT_IMAGE}"
    container_name: client
    restart: unless-stopped
    ports:
      - 3000
    depends_on:
      - api
Lastly, the deploy.sh script from the above step do most of the deployment part. The script content looks like
#!/bin/sh

ssh -o StrictHostKeyChecking=no root@$DO_IP_ADDRESS << 'ENDSSH'
    cd /app
    export $(cat .env | xargs)
    docker login -u $CI_REGISTRY_USER -p $CI_JOB_TOKEN $CI_REGISTRY
    docker pull $IMAGE:api
    docker pull $IMAGE:client
  docker pull $IMAGE:nginx
    docker-compose -f docker-compose.prod.yml up -d --build
ENDSSH
In summary, that script will
ssh into DigitalOcean droplet
export all of the environment variable required by the docker imag
e
pull the docker image from Gitlab docker registry
Run the
docker-compose.prod.yml
Finally, this is our final Gitlab workflow script that Gitlab will pick and run the CI/CD process.
image:
  name: docker/compose:1.24.1
  entrypoint: ['']

services:
  - docker:dind

stages:
  - build
  - deploy

variables:
  DOCKER_HOST: tcp://docker:2375
  DOCKER_DRIVER: overlay2

before_script:
  - export IMAGE=$CI_REGISTRY/$CI_PROJECT_NAMESPACE/$CI_PROJECT_NAME
  - apk add --no-cache openssh-client bash
  - docker login -u $CI_REGISTRY_USER -p $CI_JOB_TOKEN $CI_REGISTRY
  - chmod +x ./setup_env.sh
  - bash ./setup_env.sh

build:
  stage: build
  script:
    - export API_IMAGE=$IMAGE:api
    - export CLIENT_IMAGE=$IMAGE:client
    - export NGIN_IMAGE=$IMAGE:nginx
    - docker pull $IMAGE:api || true
    - docker pull $IMAGE:client || true
    - docker-compose -f docker-compose.ci.yml build --no-cache
    - docker push $IMAGE:api
    - docker push $IMAGE:client
    - docker push $IMAGE:nginx

deploy:
  stage: deploy
  script:
    - export API_IMAGE=$IMAGE:api
    - export CLIENT_IMAGE=$IMAGE:client
    - export NGINX_IMAGE=$IMAGE:nginx
    - mkdir -p ~/.ssh
    - echo "$PRIVATE_KEY" | tr -d '\r' > ~/.ssh/id_rsa
    - cat ~/.ssh/id_rsa
    - chmod 700 ~/.ssh/id_rsa
    - eval "$(ssh-agent -s)"
    - ssh-add ~/.ssh/id_rsa
    - ssh-keyscan -H 'gitlab.com' >> ~/.ssh/known_hosts
    - chmod +x ./deploy.sh
    - scp  -o StrictHostKeyChecking=no -r ./.env ./nginx/prod.conf ./nginx/nginx.conf ./docker-compose.prod.yml root@$DO_IP_ADDRESS:/app
    - bash ./deploy.sh
Run CI/CD in Gitlab
If your project repository is in Gitlab, once you push this script into the repo, Gitlab is going to automatically pick the new CI/CD configuration and run it immediately. If you don't store your repo in Gitlab (e.g. in Github), you can still integrate your project with Gitlab CI/CD infrastructure. In this section, I'm going to show you how to do that.
Login to your Gitlab account.
In the home page click on
New projectbutton.Select
CI/CD for external repotab in the create a new project page.Click on
Githubbutton forConnect repositories fromselection. You may need to create a Github personal token first and register it first with Gitlab.Select the repo that you want to integrate with Gitlab CI/CD pipeline, then click
Connect. It takes a couple of minutes to connect to the repo and fully integrate it. What this process does behind the scene mirror our Github repo and put it in Gitlab. There's a background process that runs the sync process between our Github repo and the Gitlab repo.Once it's connected, every commit to the repo automatically triggers the CI/CD pipeline.
In the next step, before we push the changes to our repo, we need to set up the DigitalOcean droplet first. Next, we need to set up all of the environment variables required in the CI/CD workflow on Gitlab
Setting up Digital Ocean Droplet
For this tutorial purpose, let's create a new DigitalOcean droplet. When you create a new droplet, make sure you add ssh-key that similar to the one that you are going to put in the Gitlab CI/CD environment. After you've created a new DigitalOcean droplet, you may need to ssh to the droplet and create a new folder /app in the root system. We'll use this folder to store all of our deployment artefacts.
Setting up Gitlab CI/CD environment variable
Another thing that we need to set up as well in the environment variable in the Gitlab CI/CD. As you can see from the previous part, we have setup_env.sh script that fetches all of the content from the Gitlab CI/CD environment variable and put it in the .env file. To add the environment variable in Gitlab CI/CD, you need to go to Settings -> CI/CD then expand on the Variables selection. Add the variable environment that we need in this form.

For our sample application, these are the variable that we need to put in the CI/CD environment variable:
DATABASE_URL: Postgres connection string that can be accessible in the cloudSECRET_KEY: a random string for our Flask applicationREACT_API_SERVICE_URL: The flask API URL. This variable value is the droplet API / domain name (if you have one). e.g.http://<droplet IP address>PRIVATE_KEY: SSH private key for ssh to DigitalOcean dropletDO_IP_ADDRESS: The DigitalOcean droplet IP address

Push the changes to the repo
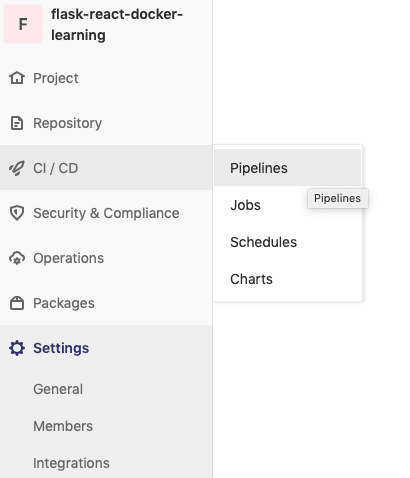
After we have everything set up, now we can push our changes to the repository. Once you have pushed it, you can go to Gitlab and open the CI/CD pipeline page. From the page, you can see there's a CI/CD process running. You can click on the running process to see what stage that is currently running.


If one of the stages failed, you can click on the failed stage and can see the full log of what's happened in the process along with the error message.


Summary
Docker and Docker Compose is a great combination tool if we want to have multiple docker containers running at the same time. It also makes it easy to deploy directly using docker-machine from our local machine. But in the real world scenario where many people are using the application, and changes happen frequently, we need a safer mechanism to deploy the changes to the production server. That's when CI/CD technology comes to the rescue. With CI/CD, the application can be tested, build and deployed automatically with a set of configurations.
In this article, I've shown how to integrate a dockerize Flask and NextJS application into Gitlab CI/CD infrastructure. The project repository doesn't have to be in the Gitlab. We can take advantage of the Gitlab CI/CD runner while our project resides in other source control platform (Github, for example). In this article, I show how to build the docker image from docker-compose.yml file, push the image to Gitlab Docker Registry and deploy the application to DigitalOcean droplet. You can add more steps in the workflow, for example, run unit test, run integration test, etc. I hope this tutorial can help you to know better about CI/CD, especially on the Gitlab environment.